Creating accessible PowerPoint slides
Why should we care about making accessible slides?
Our website governance policy commits us to creating accessible digital materials for all external-facing and student-facing content. (See the website accessibility standard.) But beyond that, digital access and educational access are human rights.
Following accessibility principles in our PowerPoint slides is one way to help us honour human rights and follow University policy.
So, how do we do it? We start with a wonderful tool known as the Accessibility Assistant.
Using the Accessibility Assistant in Microsoft PowerPoint
The Accessibility Assistant in Microsoft PowerPoint can scan your PowerPoint slides and suggest accessibility improvements to make your presentation more accessible for students. The Accessibility Assistant helps you find and fix issues such as colour and contrast, missing alt-text in visuals, table structure and readability, document structure (for example, headings and slide title), and document access.
To open the Accessibility Assistant, click Review on the top ribbon, then click Check Accessibility.

The Accessibility Assistant pane will open on the right and display a list of accessibility issues found in your PowerPoint slides, along with how many occurrences there are.
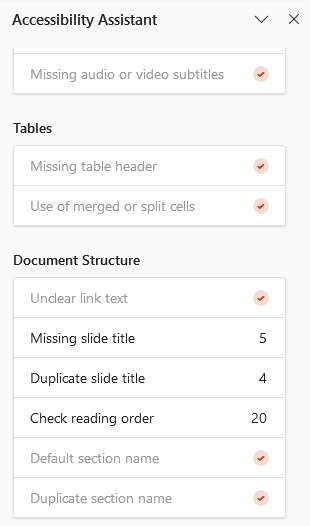
Slide titles
Adding a descriptive slide title to each PowerPoint slide helps students using screen readers follow the presentation more effectively, as they know exactly which slide is which.
Missing slide titles are flagged by the Accessibility Assistant in Microsoft PowerPoint. Follow the instructions to access the Accessibility Assistant and fix missing slide titles. It is also important to ensure there is no duplicate slide title to avoid confusion for students.
If a PowerPoint slide does not have a title placeholder, you can add a slide title or a hidden title by selecting the relevant option in the Missing slide title pane.
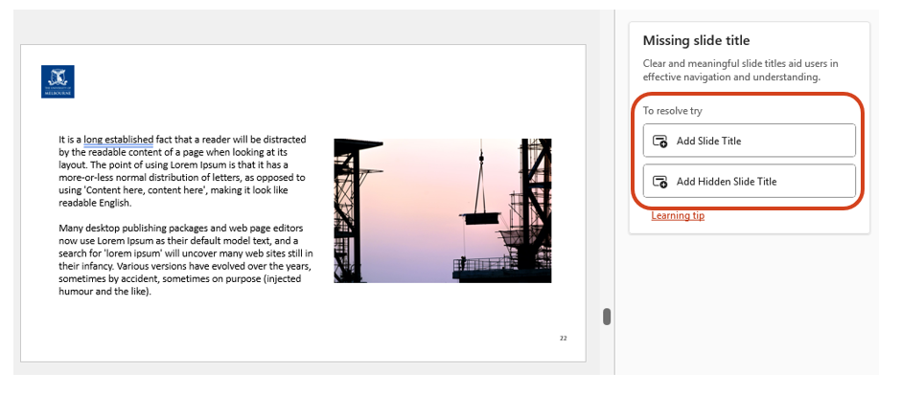
The Accessibility Assistant will also flag a missing slide title even if you have used a regular text box intended as the title. In this case, click on the text box, then select the Set as Slide Title option.
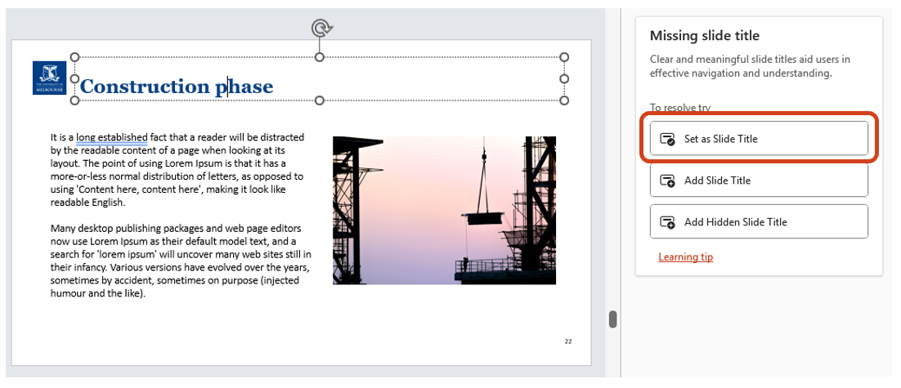
If you don't want a visible slide title
You can create a hidden slide title. Write a and then drag it off the slide into the grey area above the slide. It won't show in the presentation, but it will still help readers navigate the slide deck.
Reading order
Ensuring the slide contents are organised in a logical reading order makes a significant difference for students who use screen readers or Braille displays.
Issues with reading order are flagged by the Accessibility Assistant. Follow the instructions to access the Accessibility Assistant and correct the reading order in each slide.
The Reading Order panewill display, showing the current order of the objects on the slide. You can click on an object and drag it up and down to change the reading order.
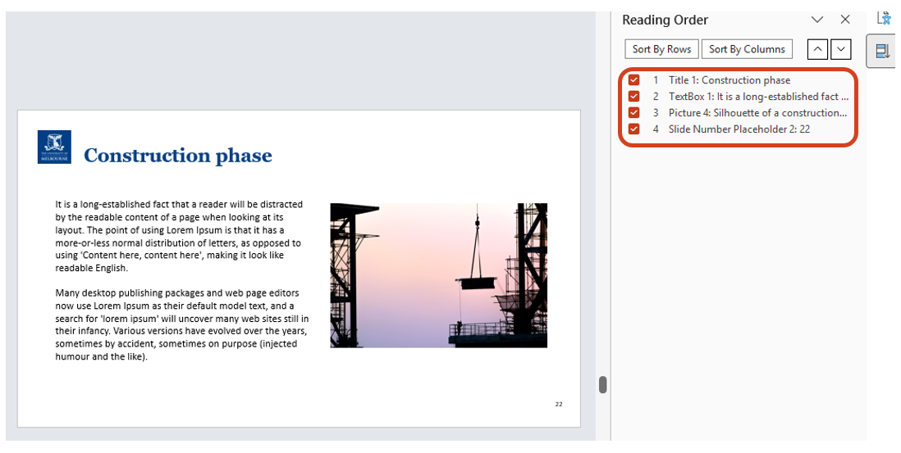
Sometimes the Accessibility Assistant will flag a reading order even when you believe it is correct. In those cases, go with your instinct over the Assistant.
Alternative texts
Adding alt text to visual elements in PowerPoint allows students who use screen readers to understand the meaning of the visual element and the important information it delivers. The alt text should not be more than 1 to 2 sentences and should concisely summarise the content of the visual element.
Missing alt texts are flagged by the Accessibility Assistant. Follow the instructions to access the Accessibility Assistant and add the missing alt text to an image.
The Missing alt text pane will open, allowing you to input the alt text for the visual element or mark it as decorative.
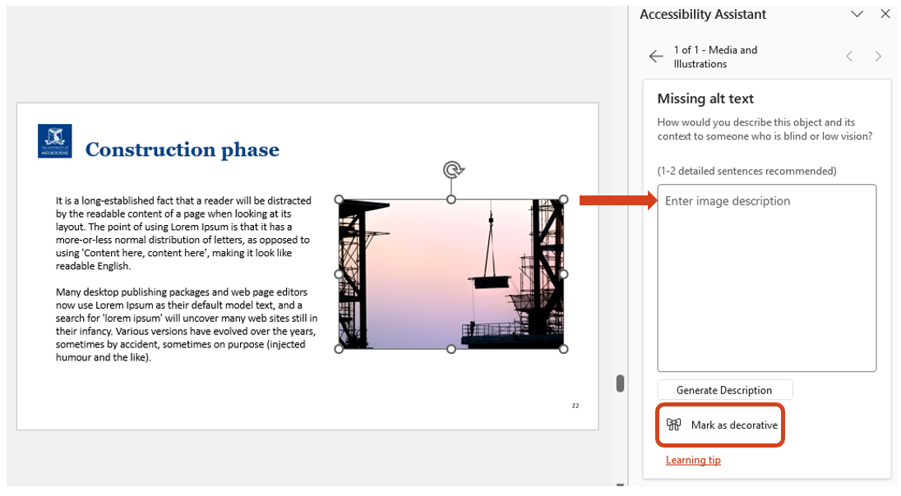
Many generative AI tools – such as Ally in the LMS or the University of Melbourne SparkAI tool – can create alt text drafts for you if you paste in an image. For detailed advice on writing alt texts, see the core accessibility skills guide.
Accessible text
The Accessibility Assistant does not yet pick up on inaccessible fonts and paragraphs.
The best practice is to use the slide title and content placeholders built into the template (the ‘Slide Master’). Content placeholders are correctly ‘marked up' for assistive technology, while manually added text boxes, sadly, are not.
Fonts
We recommend using the brand fonts: Georgia for headings and Arial for body text. If the branded fonts are not available, Calibri, Verdana, and Tahoma are good options for accessibility.
Paragraphs
PowerPoint slides often contain text paragraphs alongside images and other elements. It is important to ensure text paragraphs are formatted in a way that reduces eye strain and improves readability.
To make a text paragraph accessible:
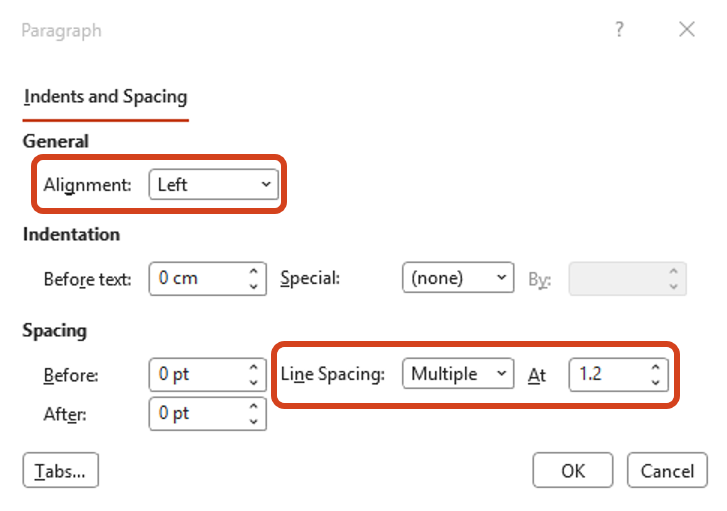
- Highlight the text paragraph, right-click and choose Paragraph from the menu
- Set Alignment to Left
- Set Line Spacing to Multiple and enter 1.2
- Click OK to save the settings.
For further guidelines on how to ensure written content is accessible, refer to the core accessibility skills guide.
Accessible tables
Before converting information into a table, pause and check whether a table is necessary or whether the information can be presented with headings and paragraphs instead. Tables can be useful to present a large amount of numerical data or compare information across consistent and specific criteria.
If you need a table, use PowerPoint's in-built table feature with headers, so screen readers can identify column headings, and provide an alt text.
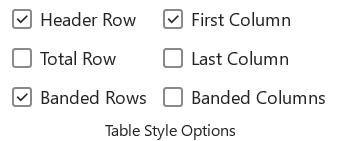
To add a built-in table to your PowerPoint slide, click Insert on the top ribbon, then click Table and select the number of rows and columns required. Ensure the Header Row checkbox on the top ribbon remains selected (this is the default setting). The First Column checkbox can also be selected to create row headers if needed.
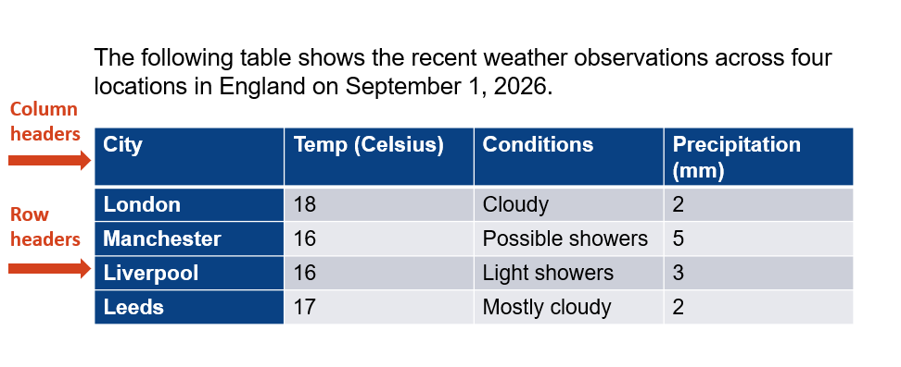
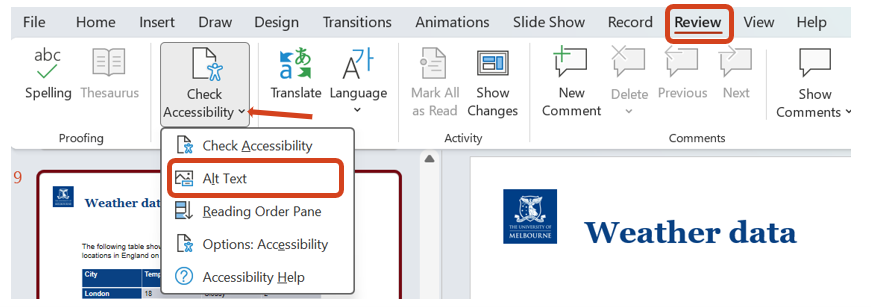
You can add an alt text to the table and provide a brief description of what it is in the table so that screen readers can decide whether the table is worth reading cell by cell. Click Review on the top ribbon, then click on the small down arrow next to the Check Accessibility button. Select Alt Text to open the Alt Text pane and input the alt text for the table.
Accessible links
Another common accessibility issue that the Accessibility Assistant does not flag is inaccessible, non-descriptive hyperlinks. Screen-reader users may struggle when links on the PowerPoint slides read "More information", "Click here" or "Learn more" because these phrases lack context and direction. Similarly, long raw web addresses on slides force screen readers to read out every letter and number contained in the links, which can be confusing.
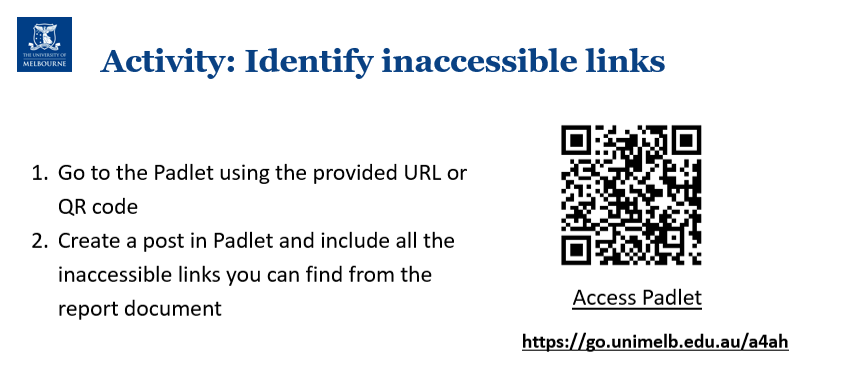
We recommend using concise and descriptive link text that informs students of what information they will find when they follow the link. If students must visit a website to participate in a learning activity, provide students with a shortened URL and a QR code using the University of Melbourne's short URL creation tool, so students can open the site quickly on their chosen device.
Checklist: accessible PowerPoint slides
For all PowerPoint files:
- Each slide has a unique slide title, which is marked up as a slide title.
- The reading order makes sense for each slide.
- Images and tables have alt texts summarising their content.
- The slide has a straightforward layout (not too cluttered).
- Purely decorative images are marked as decorative.
- Tables have header rows/columns designated in the Table Design menu.
- Links are shown in readable ways, such as a QR code and short link (for content accessed visually in a presentation), or a meaningful hyperlink (for content accessed digitally).
If you have control over the font and paragraph styling:
- The slide text uses accessible fonts, such as Georgia and Arial.
- Paragraphs have line spacing between 1.1 and 1.5, and there is space between paragraphs.
- Paragraphs are left-aligned rather than centred or 'justified’.
- There is high contrast between the font colour and the background colour.
- Text isn't overly small.
The fonts, font size, text alignment and contrast in the University of Melbourne template (login required) is accessible as long as you avoid the 'small text' slides.
The Accessibility Assistant can speed up this process.
Resources
Guidance for all digital materials
- Policy: University of Melbourne standards for web accessibility (University policy under MPF1392)
- Guide: Core accessibility skills
- Hub: Disability inclusion resources – links to resources for staff and students with disabilities, as well as accessibility information.